Whenever I teach case report form (CRF) design in the OpenClinica Central User Training class, the thought that always comes to mind is, “so many features, so little time.” OpenClinica has so many features available for building your CRFs, that there is no way to cover every possibility within the limited timeframe of a training class. Fortunately, there are other ways of getting information out to users, so here I am to introduce you to additional features you may want to incorporate into your CRFs.
Some of these features use JQuery, a cross-platform JavaScript library designed to simplify scripting HTML. The JQuery code in the attached CRF template was tested on Firefox 35.0.1; it may function differently in different browsers or different languages. As with anything you set up for your study, if you decide to use any of the features presented here, be sure to test them in your test environment prior to using them in production.
Click to download: Kitchen Sink CRF and Associated Rules (zip file)
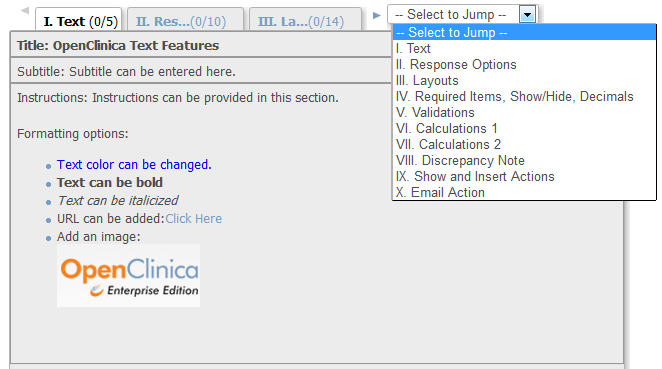
The attached CRF has 10 sections, and each section focuses on different feature sets. To see a list of all the Sections, click the drop-down arrow in the “Jump” box and then click the appropriate Section topic to see the features included within that topic.
Throughout the CRF, each feature is labeled so you can easily recognize it and locate it in the CRF template. For example, “Left Item Text” is not a prompt you would ever include on your CRF, but it is the feature being demonstrated and is labeled as such so you can easily see where Left Item Text appears on any CRF you design. Each Section of the CRF is listed below with a brief description as well as a screenshot so you can see how the features are represented.
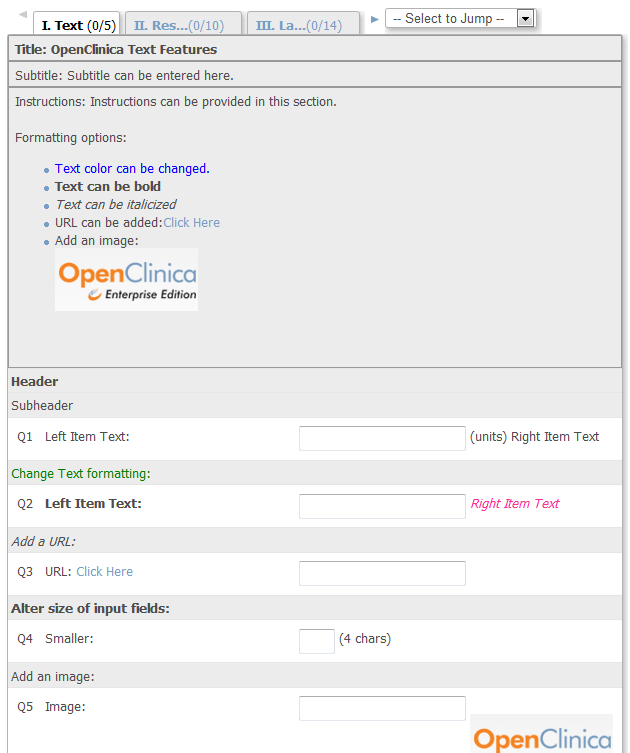
1. Text
The Text Section illustrates various text features such as bold, italics, colors, and displaying images or a URL. This section also covers the positioning of left item text, right item text, header, subheader, title, subtitle, and instruction text. The Instruction area of this section includes many text options that you can apply. If you would like to include blue text on your CRF, simply reference “Text color can be changed” in the Instructions cell of the Section worksheet of the attached CRF template and copy the formatting into your CRF.
2. Response Options
This Section illustrates the various means of displaying responses on your CRF. It also provides additional features such as the “undo” button for deselecting a radio button, and an example of how to include a Visual Analog Scale. Again, simply reference the associated items in the Response Options section of the attached CRF template and copy the features you’d like into your CRF.
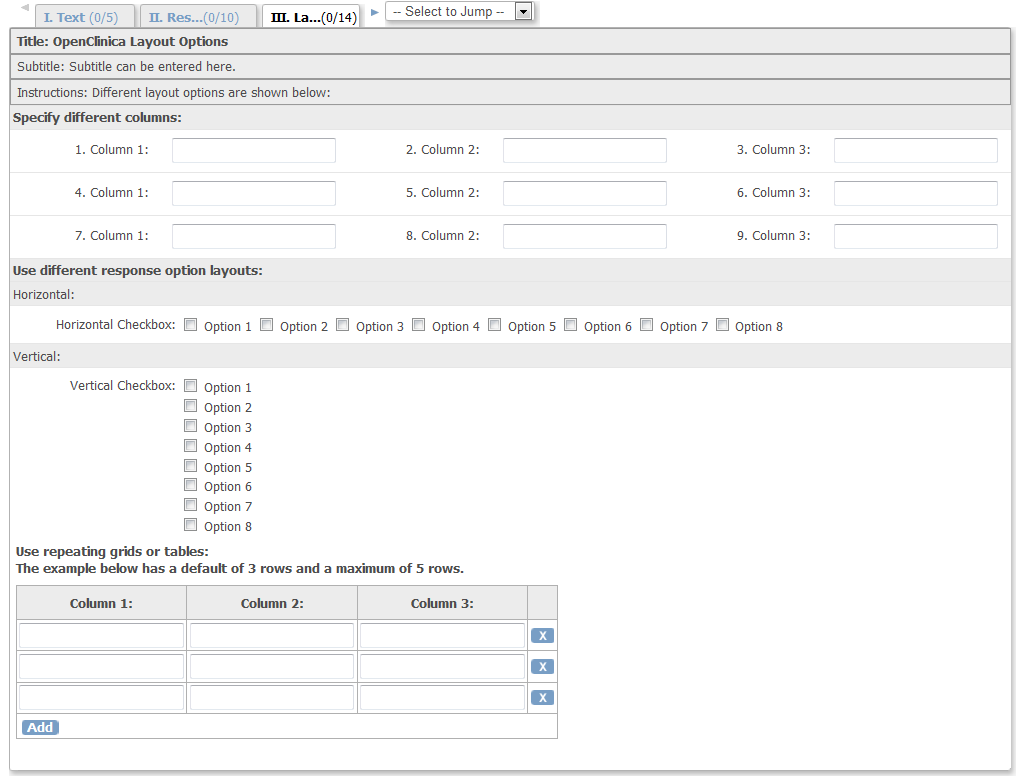
3. Layouts
The Layouts Section features different layout options such as column positions, horizontal vs. vertical checkboxes, and grid displays.
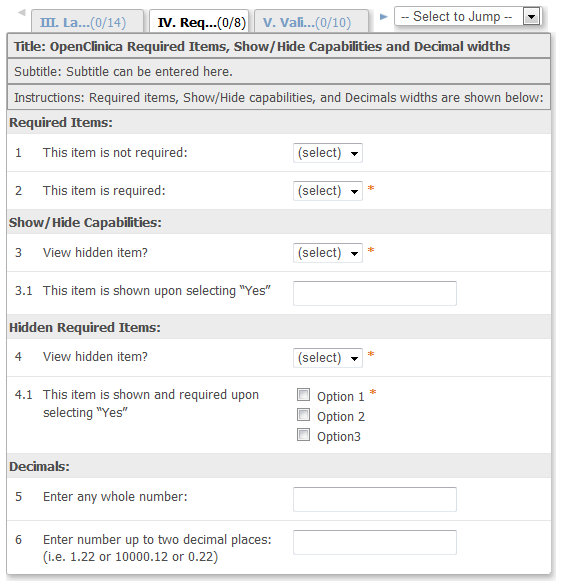
4. Required Items, Show/Hide, Decimals
This section demonstrates show and hide functionality, shows how real numbers (decimals) are displayed, and illustrates how required items are represented.
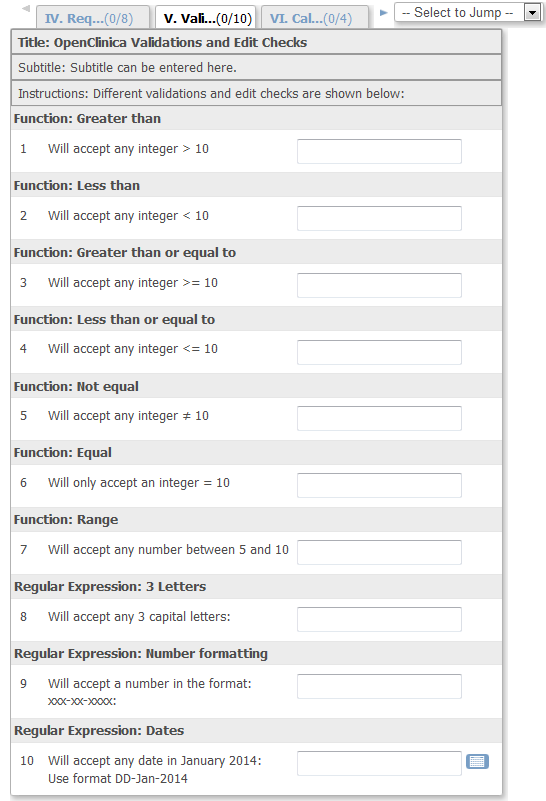
5. Validations This section demonstrates the various simple validations that are possible within the CRF template (less than, greater than, ranges, etc.). It also includes examples of some regular expressions.
6. Calculations I
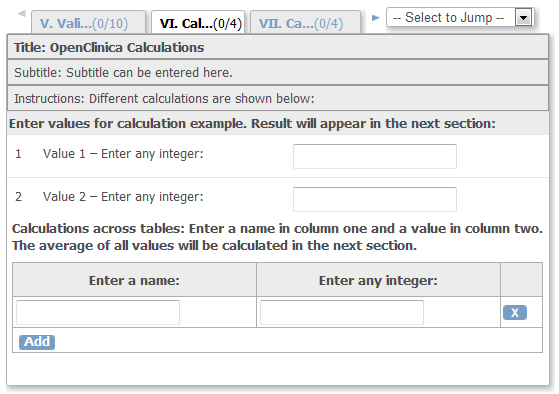
This is the first of two calculation sections. In this section, you’ll see examples of calculations and group calculations. You’ll have to upload the CRF, associate it with an event, and enter data to see the calculations in action.
7. Calculations II
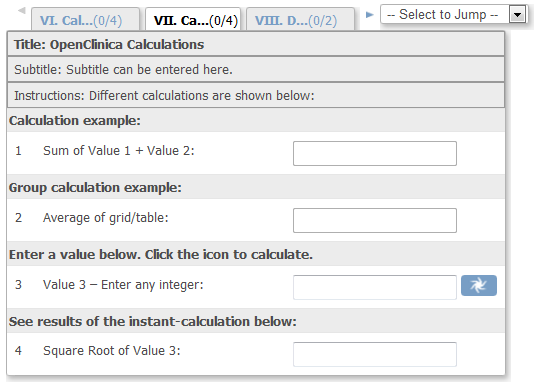
This second calculation section shows additional calculations and includes JQuery code for including a “calculate” button and for doing instant calculations. As above, you’ll have to upload the CRF, associate it with an event, and enter data to see the calculations in action.
8. Discrepancy Note*
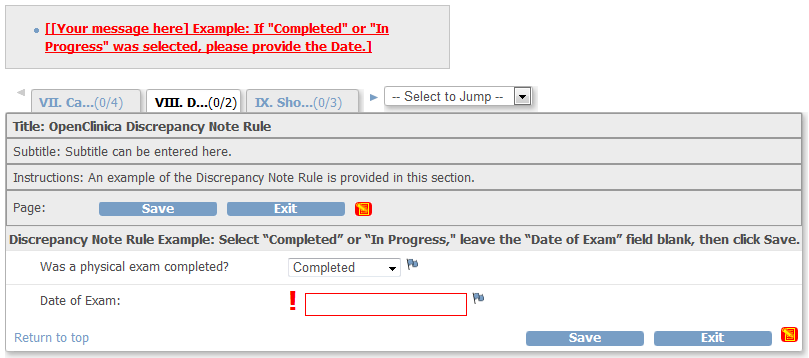
The Discrepancy Note Section illustrates the effect of a Discrepancy Note Action Rule.
9. Show and Insert Actions*
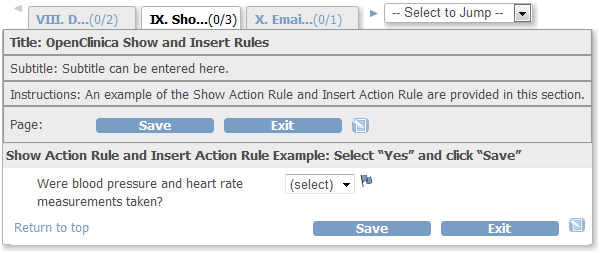
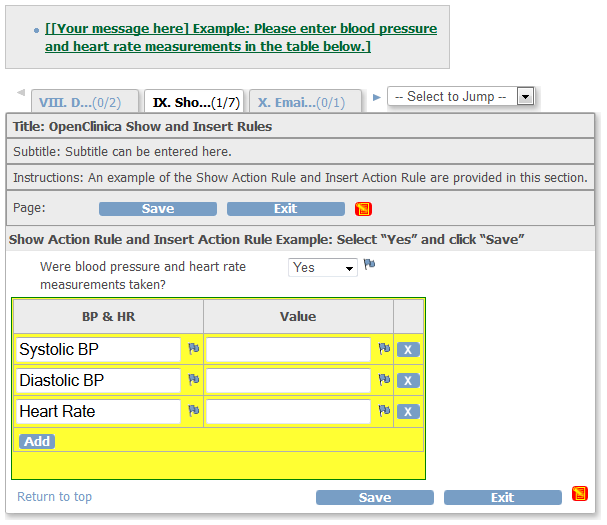
This Section illustrates the effect of Show and Insert Action Rules.
Before the rule is fired: After the rule is fired:
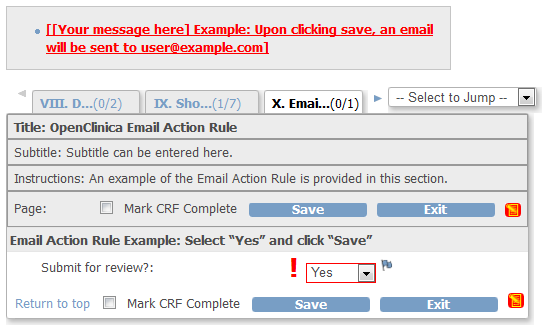
10. Email Action*
This Section illustrates the effect of an Email Action Rule.
*These last three Sections listed have Rules associated with them, and the Rules must be uploaded in order to experience the full functionality of these Sections. The Rules are also attached to this post. If you want to use these Rules in your Study, be aware that you’ll have to edit them to reference the correct Object IDs for your Study.
So there you have it – one CRF, with everything but the kitchen sink. Check out the features and use them as you like. Just keep in mind that when designing CRFs, keeping it simple is always the best approach. There are times, however, when adding a little style to a form can help clarify things for data entry and may even help reduce discrepancies.
Happy designing!
Laura
Acknowledgements: Special thanks to Gerben Rienk Visser of Trial Data Solutions for many of these ideas, and to OpenClinica Application Support Engineer Jessica Gosselin for creating the Kitchen Sink CRF – we hope you find it useful!

